Create Teacher / Staff Account in Testpress
- Navigate to the "Memberships" section within the system's main menu.

- Click on the "Add member" button to initiate the account creation process and select "Create User" or "Invite by email," depending on your preference.

- Provide a username, password, and email address for the new teacher.

- Set the new user's status to "Staff."
- Grant all available permissions to the teacher role.
- Select a Role:
- In the Roles dropdown, choose the appropriate role for the user (e.g., Admin, Instructor, Manager, etc.).
- This defines the permissions the user will inherit in addition to any directly assigned ones.
- You can also click the green "+" icon to add a new role if needed.
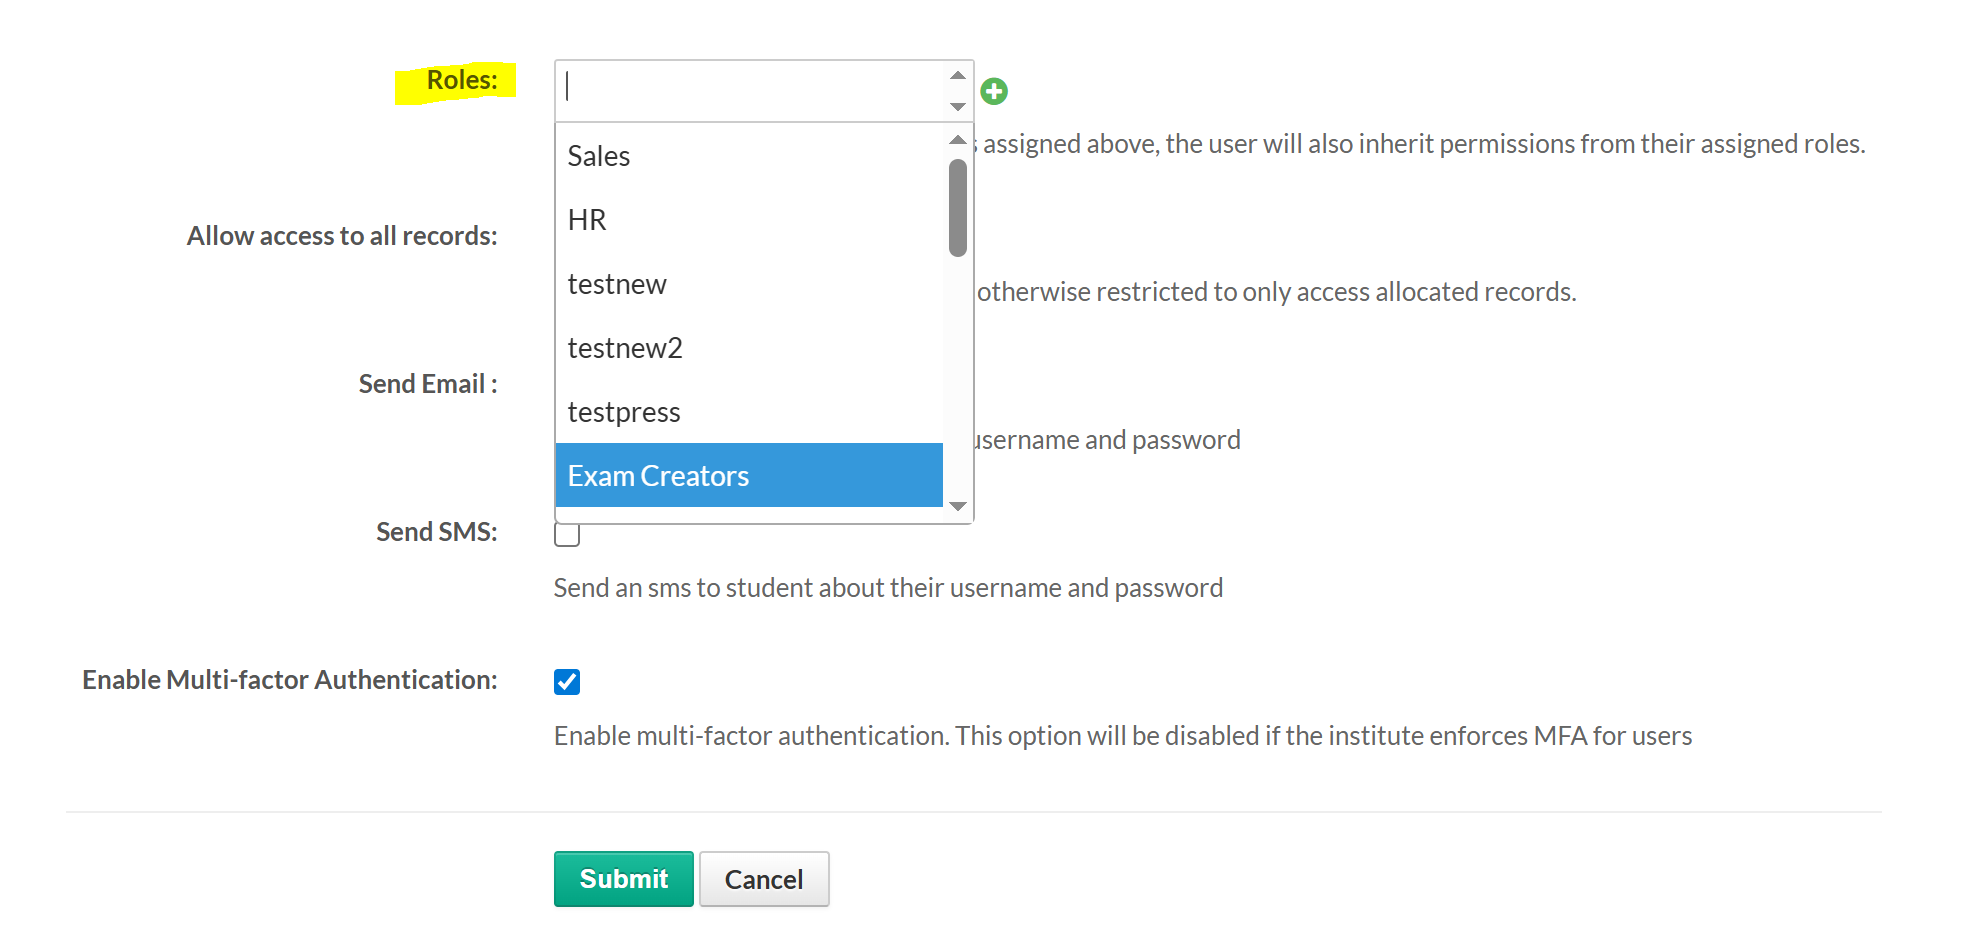
- Allow Access to All Records (Optional)
- Check this box if the user should be able to access all records, not just the ones assigned to them.
- If left unchecked, the user will only access data explicitly allocated to them.
- Send Email (Optional):
- Check this box if you want the system to send an email to the user (e.g., student) containing their username and password.
- This is useful for notifying users automatically after account creation.
- Send SMS (Optional):
- Check this box if you want the system to send an SMS with the user's login credentials (username and password).
- This is helpful when the user prefers mobile communication.
- Enable Multi-factor Authentication (MFA) (Optional):
- Enable this if you want to apply an additional layer of security.
- Note: This option will be disabled automatically if the institute has enforced MFA globally for all users.

- Click the Submit Button
- Once all required fields and preferences are selected, click the Submit button to save the user profile and apply the settings.
.png)


